
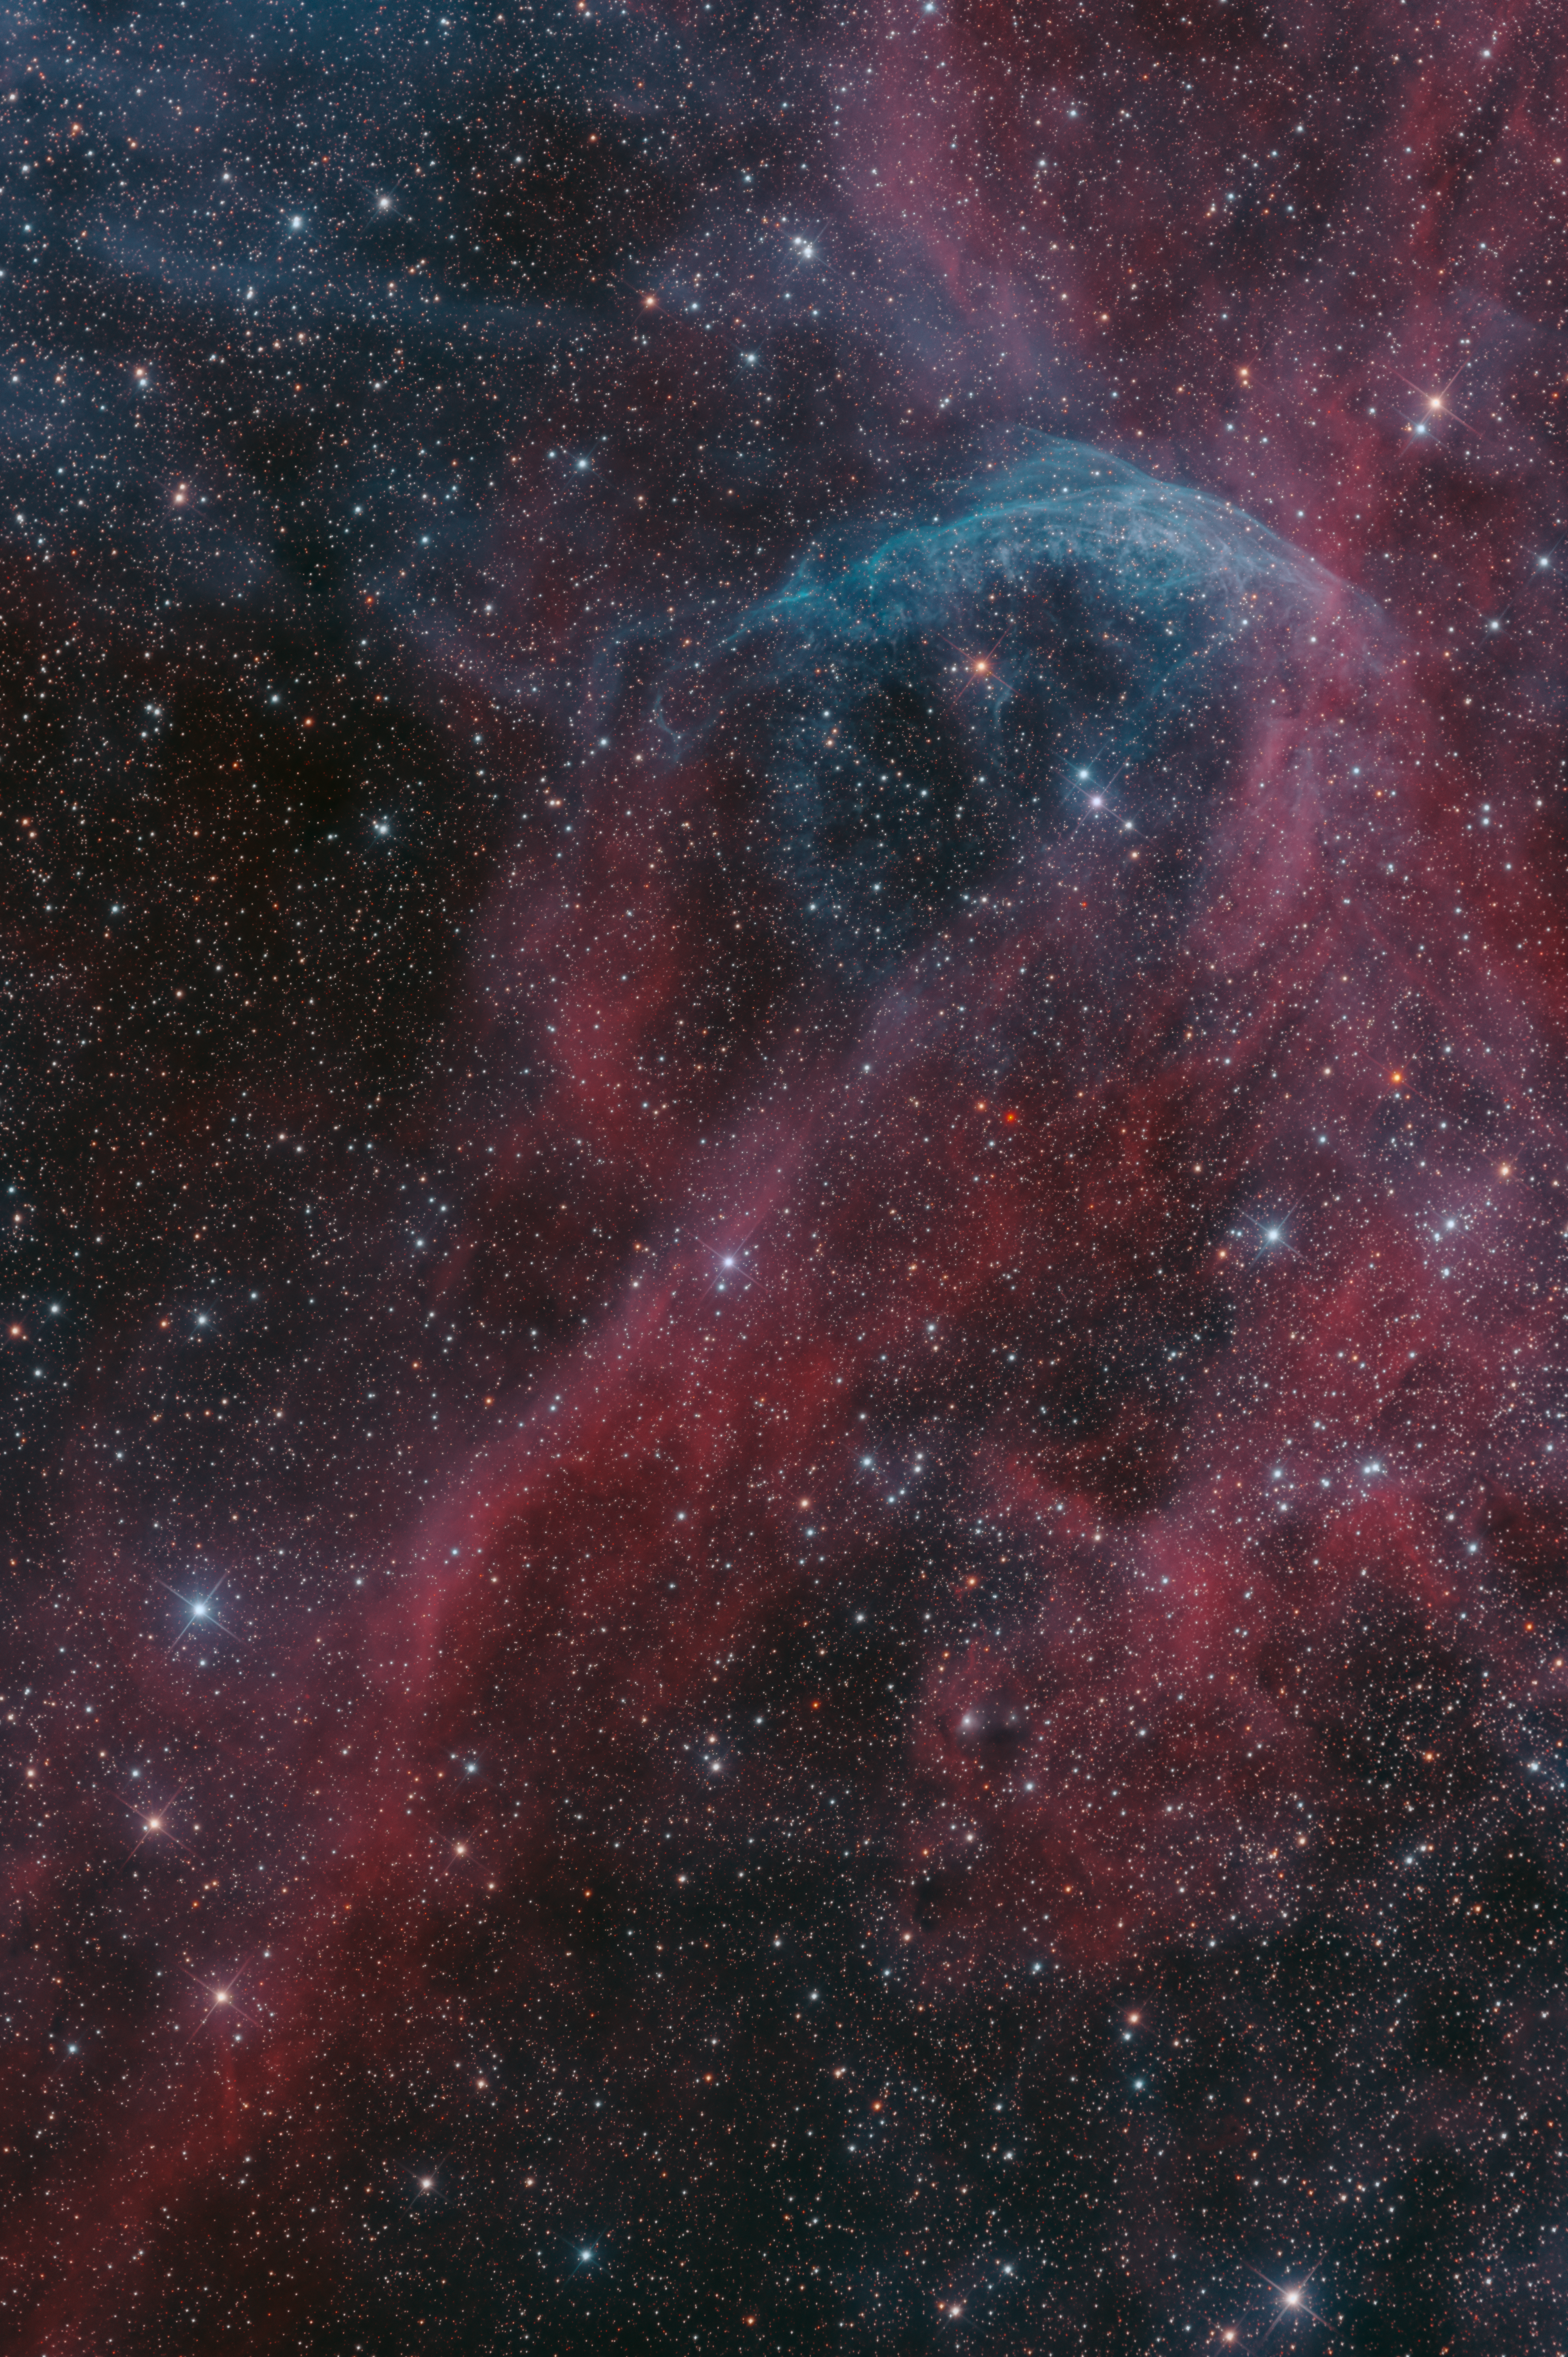
This summer I took some extra time to take a second attempt at imaging the Wolf Rayet nebula in Cygnus, one of my favorite Oxygen targets in the summer sky. This blue shell of oxygen is illuminated by a surge of solar radiation and wind from the WR134 variable star. Most of the oxygen in this area of the Milky Way is soft and dispersed, so I am always intrigued when there are more dynamic factors that push these gases around to form interesting arc-like and circular shapes with sharp edges. As a favorite, I’m sure I’ll be revisiting this region many more times to come.

Follow Me on Instagram | Astrobin | DarkFlats
Would you like to edit the data yourself? The raw masters have been published in the PixInsight Open .XISF format here (523 MB), licensed under Creative Commons Attribution 2.0 Generic (CC BY 2.0)
Acquisition
All data was taken from my Bortle 4 backyard over 11 nights between June 17th and September 03rd
| Filter | R | G | B | Ha | Oiii3nm | Oiii6nm | Sii6nm |
|---|---|---|---|---|---|---|---|
| Totals | 2:03 | 2:03 | 2:03 | 6:12 | 6:48 | 4:03 | 5:09 |
Total integration time: 28hr 21m
Equipment:
Orion 8in F4.9 1000mm Newtonian Reflector
- Flocked / Primary mirror replaced due to turned-down-edge
Sky-Watcher F4 Aplanatic Coma Corrector
Orion Atlas Pro
Moonlite Litecrawler Focuser/Rotator
QHY268m cooled monochrome camera
QHYCFW3L - Filter Wheel with mixed set of narrowband and broadband filters
Antlia 3nm Ha
Chroma 3nm Oiii
Astronomik Deep-Sky RGB
Astronomik 6nm Sii
Astronomik 6nm Oiii
LattePanda Delta with Windows 10
Preprocessing
All pre-processing and post-processing was done in PixInsight.
Inspected all subs for bad images with Blink, discarding subs containing clouds or star elongation from poor guiding
Calibrated all subs with their corresponding master flat and master dark
- flats were calibrated using corresponding DarkFlats
Used sub-frame selector to weight all images based on the following weighting
1 |
|
Selected the best sub from sub-frame selector and blink to use as a reference frame for aligning and integration
Integrated all subs of the same filter together (All data from both 3nm and 6nm Oiii filters were integrated together) to produce masters for Hydrogen, Oxygen, Sulfur, Red, Green and Blue images
RGB Processing
The RGB data was taken primarily for star color and so has moderately low integration time compared to the narrowband counter parts. To produce the star color image the following steps were done on the with the RGB masters
Cropped away the stacking edges
Linear fit Red and Blue masters to the Green Channel
Dynamic Background Extraction using a few large points to remove the large scale gradients in each master
Channel Combination in RGB mode to create the color image
Photometric Color Calibration was performed using broadband mode with a background neutralization reference
Masked Stretch was used to bring the image nonlinear
Curves were used applied to brighten the image a bit further
The star cores were smoothed slightly using convolution and an extracted luminance mask
Narrowband Processing

The strategy for this image was to produce a natural color image of the Wolf Rayet Ring nebula in the RGB spectrum. As such two images were produced and color calibrated, using the HOO and SOO pallets, and then using photometry to color calibrate. The following steps were performed to produce the resulting SHOO image.
Cropped away the stacking edges
Linear fit the Hydrogen and Sulphur images to the Oxygen channel
DBE was performed using a few large points to remove the large scale gradients in each master
Small Scale Noise Reduction was done on each master using TGVDenoise with a low contrast mask and an auto-stretched local support (Documented by Jon Rista)
A HOO image was created by mapping Hydrogen to the Red channel and Oxygen to the Blue and Green and then color calibrated using photometric color calibration
A SOO image was created by mapping Sulphur to the Red channel and Oxygen to the Blue and Green and then color calibrated using photometric color calibration
A SHOO image was created by adding the two images together in PixelMath with the Rescale option checked
SOO+HOOThe resulting image was then stretched to non-linear using histogram transformation with no clipping, and extending the high-range by 0.02 to minimize over-saturating stars
The RGB Workingspace was set to 1 for all channels to allow future extracted luminances to be representative of the post-color calibrated data
Star Mask Preparation
Two star masks were created to perform a number of additional tasks in post processing. They were both created using the following steps:
A luminance was extracted from the SHOO image and named StarMask
Using MultiscaleMedianTransformation all wavelet layers were removed except layers 2 and 3 (small scale star mask)
Using MultiscaleMedianTransformation all wavelet layers were removed except layers 4 and 5 (large scale star mask)
Clone-stamp was used to remove small DSO features that were not actually stars from the resulting mask
The star mask was clipped using histogram transformation by bringing in the white point down to 25% and bringing the black point up to exclude faint small-scale nebula structures
Each mask was then convolved to soften the harsh edges
The star mask was clipped one more using histogram transformation by bringing in the white point down to 25% again
Star Reduction
An iterative approach was performed to star reduction that consisted of the following steps:
A luminance was extracted from the image and then multiplied by the star mask to get a representative state of the stars currently in the image
An expanded star mask was created by copying this star mask and using Morphological Transformation using dilation
A contours mask was created by subtracting the representative star mask from the expanded star mask
Morphological Transformation using Morphological Selection was performed using the contours mask targeting the SHOO image using a small amount and multiple iterations
This entire process was repeated twice for each the large scale star mask and the small scale star mask and then also performed on the Blue/Green channels separately. (The second pass performed after the large scale processing section mentioned further below.) Each pass at the overall reduction regenerated the new representative, expanded and contours based star mask each time it was performed and careful attention to make sure stars that were close together in the result did not start forming webbing that connected them.
The resulting star reduced image was then blended back into the non-reduced version by a factor of 30% using PixelMath:
.3*BeforeStarReduction+.7*AfterStarReduction


Combining RGB Stars

The resulting SHOO image and the RGB image were then combined to allow the natural star color from the RGB filters to be applied to the stars in the narrowband image. To achieve this the following steps were taken:
Channel Extraction was used to separate the chrominance layers from the RGB image using LAB mode and extracting A and B.
A luminance was extracted from the SHOO and then multiplied by the star mask to get a representative state of the stars currently in the image and then expanded slightly using the Dilation Morphological Transformation process so that it also includes the color halos surrounding the cores. This mask then had it’s white point clipped slightly and then also slightly convolved.
Channel Combination was then used to apply the extracted RGB_A and RGB_B images into the AB portion of the SHOO image with the newly created star mask in place, allowing only the color data from the stars and their halos to be transferred.
Large Scale Processing

With the resulting SHOO+RGBStars image, some attention was spent to try and better emphasis the dynamics at play between the Sulfur, Hydrogen and Oxygen in the area. To accomplish this the following tasks were performed:
A copy of the image containing the large scale only was created by using MultiscaleMedianTransformation and enabling only wavelet layer 8 and the residual layer
The small scale components were then placed in a separate image using PixelMath by subtracting the LargeScale from the SHOO image
SHOO-LargeScaleThe large scale image was balanced for color using histogram transformation. The black-point for each of the channels were brought in while avoiding clipping and the midpoint was balanced at 12.5% of the histogram.
The background of the large scale image was convolved slightly to minimize harsh transitions that resulted from the histogram balancing
The highlights of the ring nebula were equalized using Local Histogram Equalization targeting a radius of 90
The large and small scale components were re-combined and blended back into the original SHOO image at 20% using PixelMath with rescale checked:
.2*SHOO+0.8*(LargeScale+SmallScale)
Enhancing Sii/Oiii contributions

A large scale Sii and Oiii mask were created by taking the noise-reduced Oiii and Sii masters, applying a histogram stretch to each of them, and then with PixelMath subtracting the stars using the star mask, stretched and then convolved.
- These large scale Sii and Oiii masks were used to apply an additional round of Local Histogram Equalization targeting larger scales for Sii and smaller scales for Oiii to emphasize their contribution to the overall field.
Final Touches
A second round of star reduction was performed using the same technique previously described.
One additional pass of large-scale separation and recombination was performed to reduce the large-scale greens in the mid-tones of the image.
Dark Structure Enhance was used to increase the contrast of the background, with an amount of 12%
An ICC Profile was applied to enable Black Point Compensation and then saved as Jpeg and PNG for viewing on the web
Constructive criticism is welcome. Let me know what you think! How can I improve?